設定郵件程式對於 WordPress 來說可說極其重要,那郵件程式為什麼那麼重要呢?當你的 WordPress 遇到忘記密碼、新使用者註冊或重設密碼等等,都會需要使用到郵件程式。但我相信剛開始接觸 WordPress 的人,會想說要如何設定才可以讓 WordPress 後台寄出電子郵件呢?對於一個不太會程式且不太會打指令的人來說,使用外掛來幫助設定郵件程式可以省很多麻煩事。
這一次主要是使用 Gmail API 來設定郵件程式,並且會用一個外掛來輔助設定。Gmail 可說是無人不知無人不曉,並且有相當高的穩定性,拿來當郵件程式應該是蠻理想的吧!但設定起來會比其他郵件程式來的複雜一點,且 Gmail API 是有使用上限的,大概一天 200 多封的額度(詳情依照 Google 官方文件說明),對於個人部落格或是用量比較小的人,可說是相當足夠了!
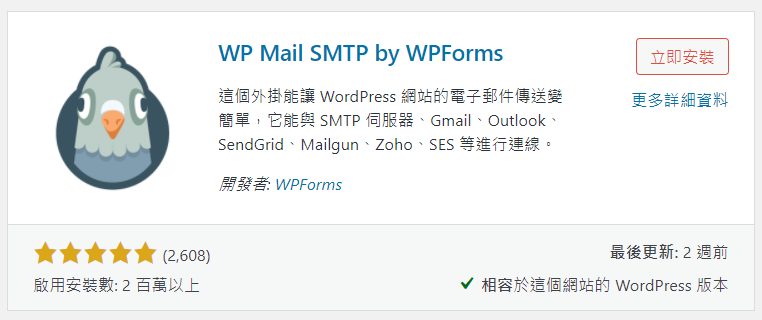
外掛名稱-WP Mail SMTP
官方網址-https://wpmailsmtp.com/
外掛網址-https://tw.wordpress.org/plugins/wp-mail-smtp/
第一步
安裝外掛,並啟用
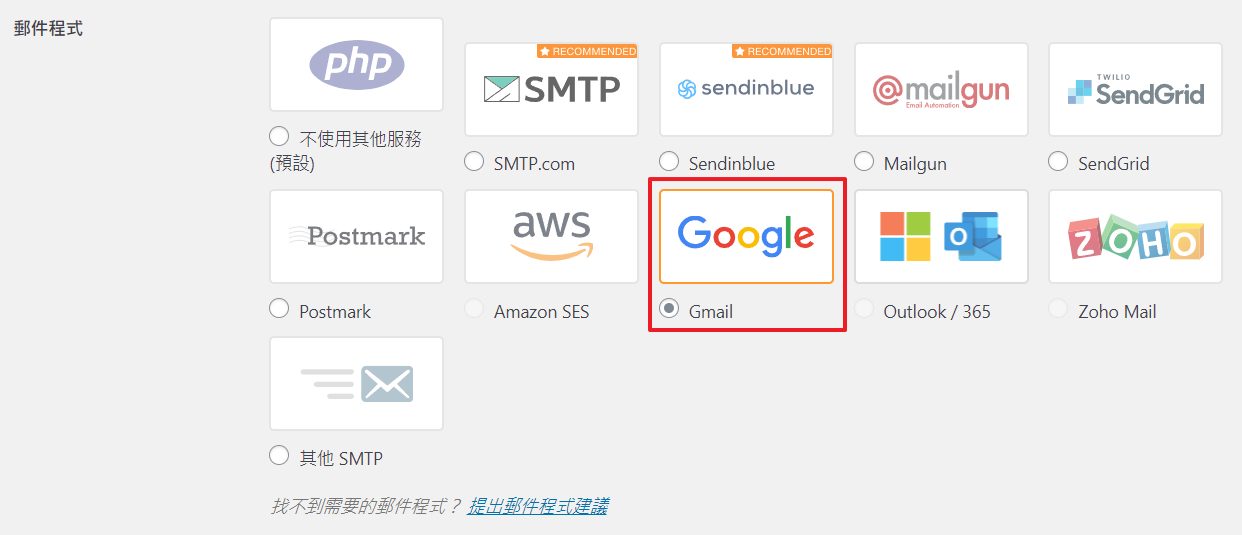
安裝完後,進入到 WP Mail SMTP 設定中,可以看到這個外掛可以設定各式各樣的郵件程式。而這一次先以 Gmail 來教學
第二步
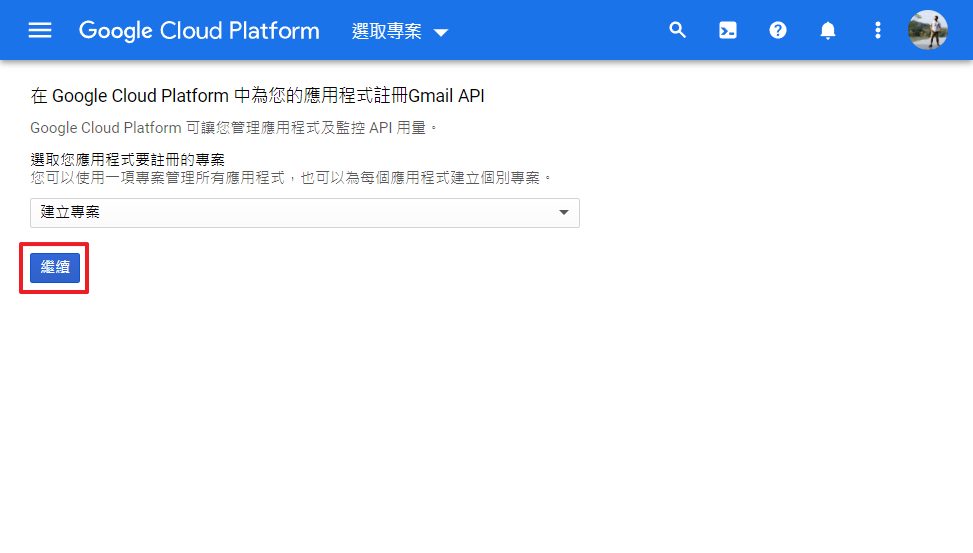
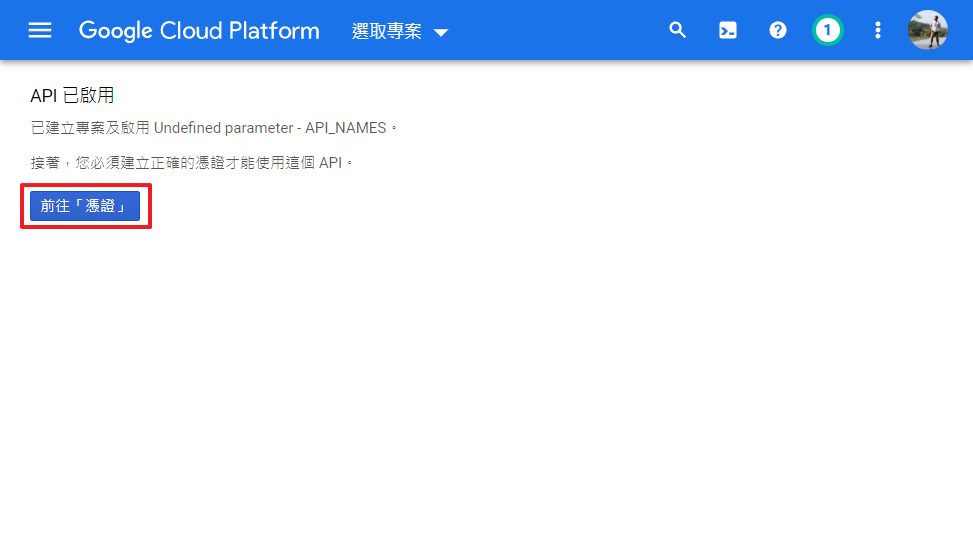
由於要使用 Gmail API 就需要到 Google Cloud Platform 去申請 Gmail API 的使用權。
網站名稱-Google Cloud Platform – Gmail API
網站網址-https://console.cloud.google.com/flows/enableapi?apiid=gmail&pli=1
進入到 Google Cloud Platform 的 Gmail API 申請網頁中後,要先建立一個專案,直接點繼續即可。
啟用 API 後,我們要開始設定憑證
設定憑證只需要按照下面的設定即可
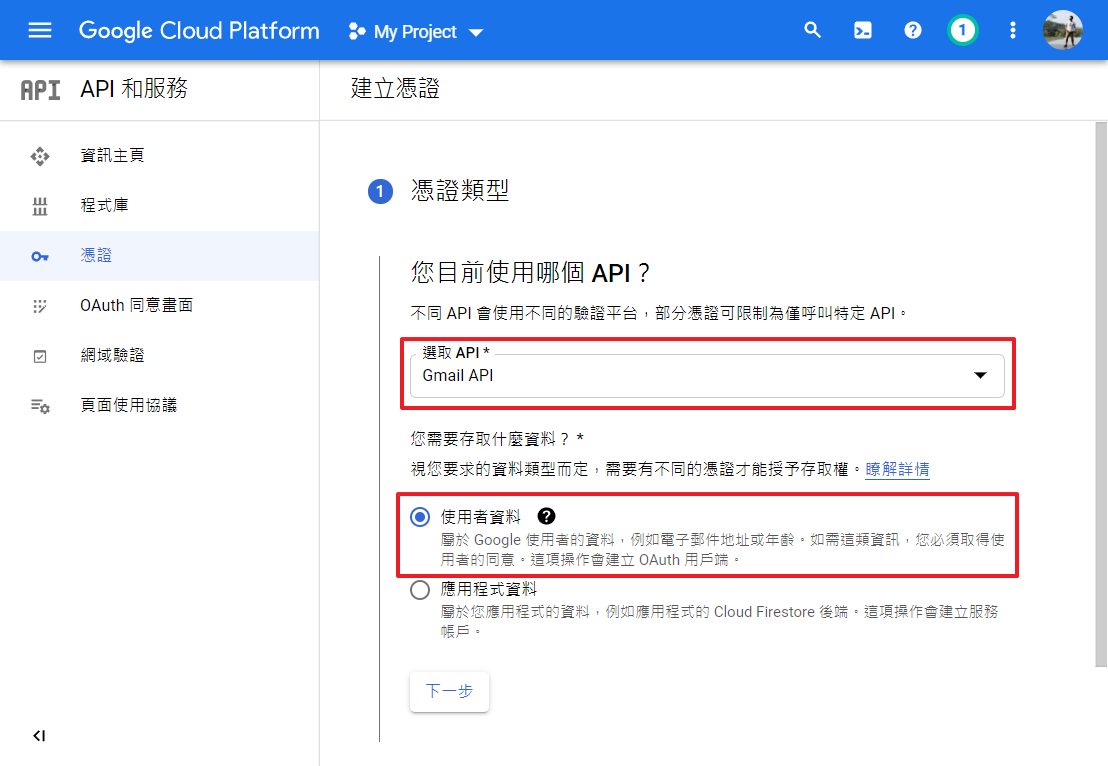
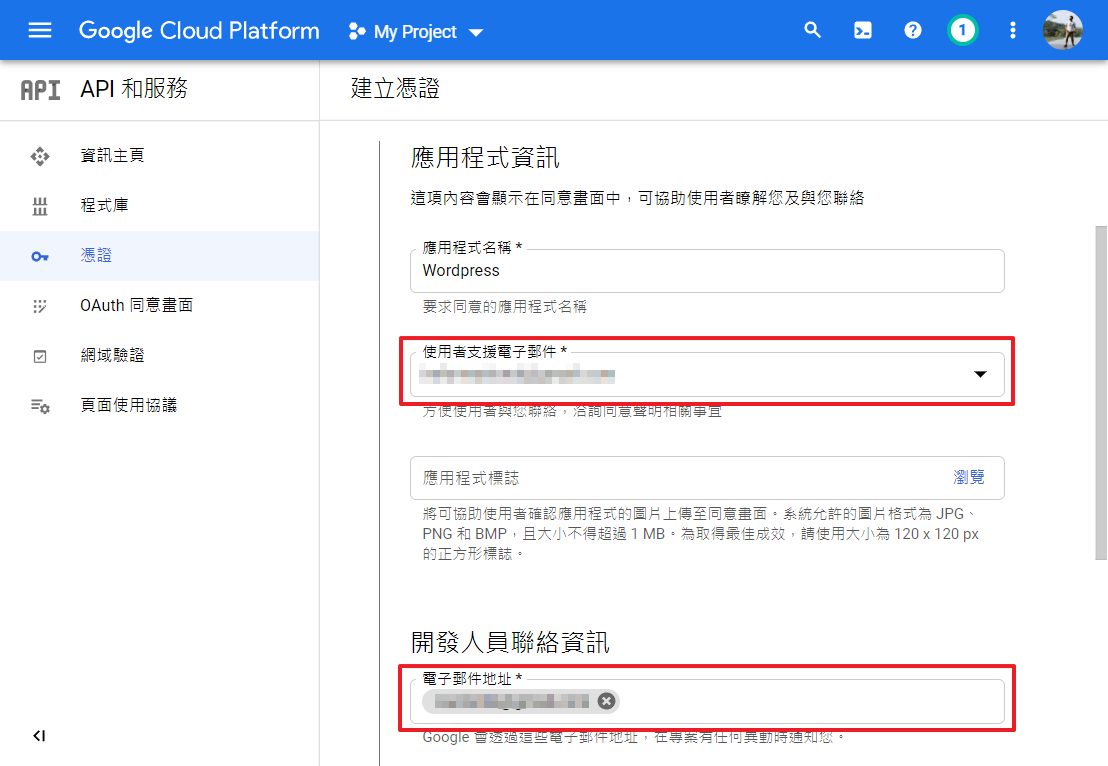
名稱就填入你看的懂得文字。電子郵件就填入你常用的即可。
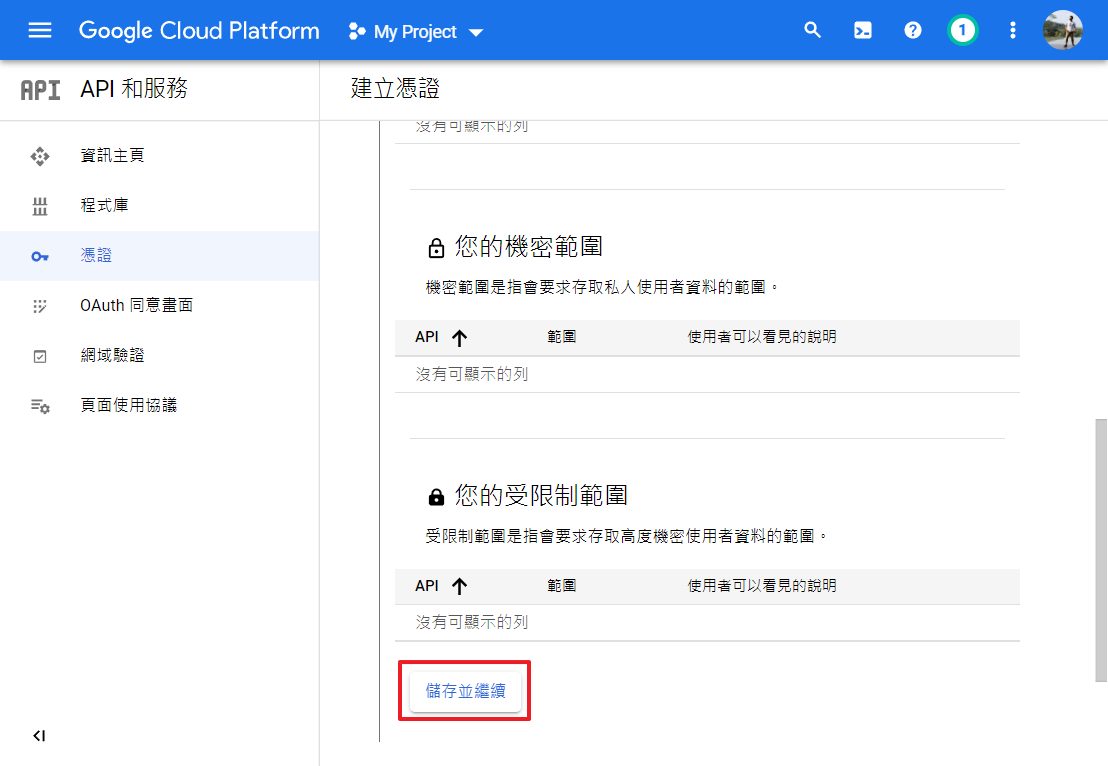
按繼續
輸入 OAuth 用戶端 ID
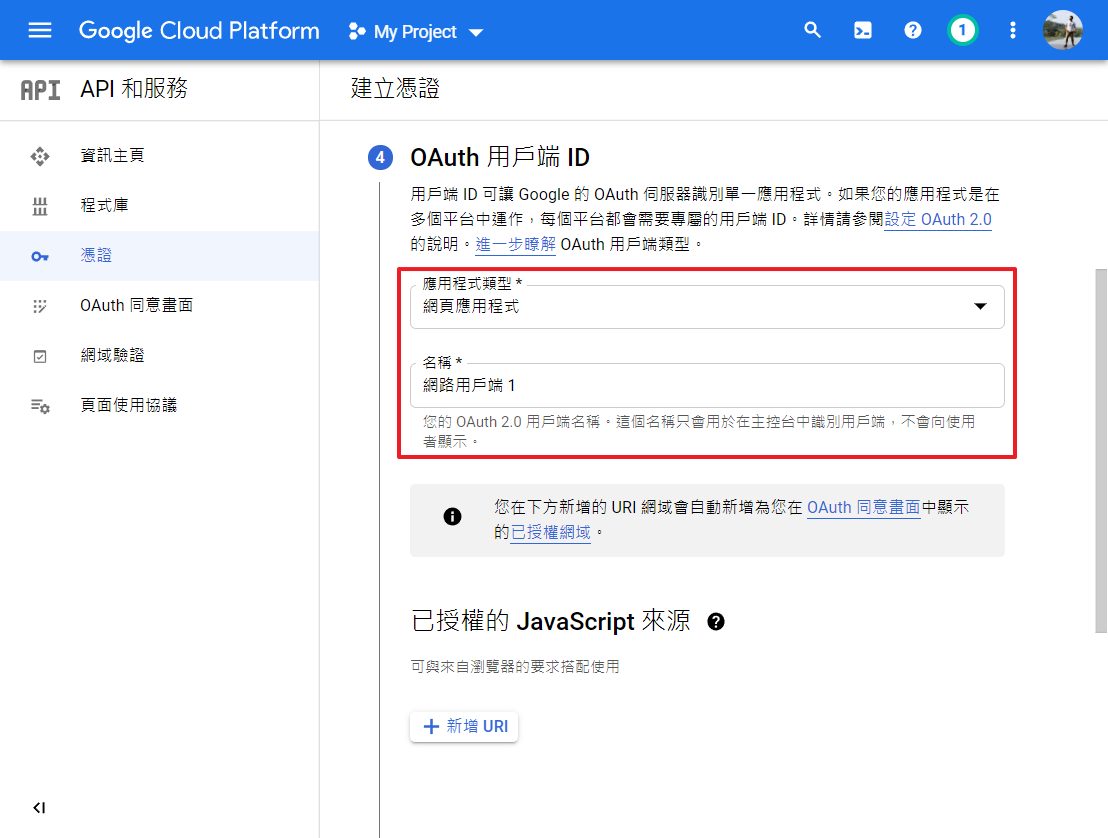
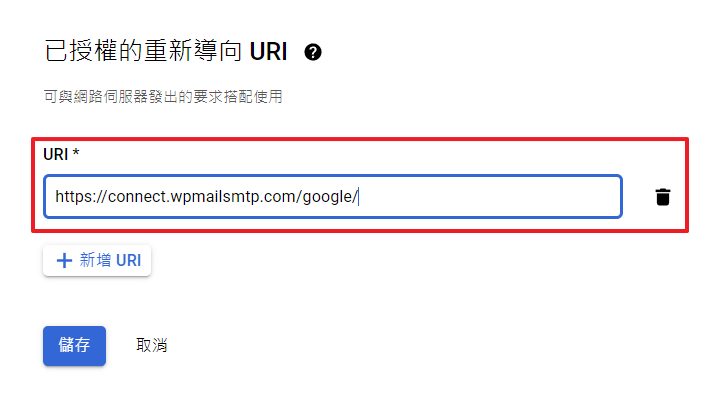
接著要輸入重新導向 URL。由於我們是使用外掛來介接 Gmail API,所以這邊需要輸入外掛所提供的 URL。該 URL 可以在外掛的這定頁面中找到。

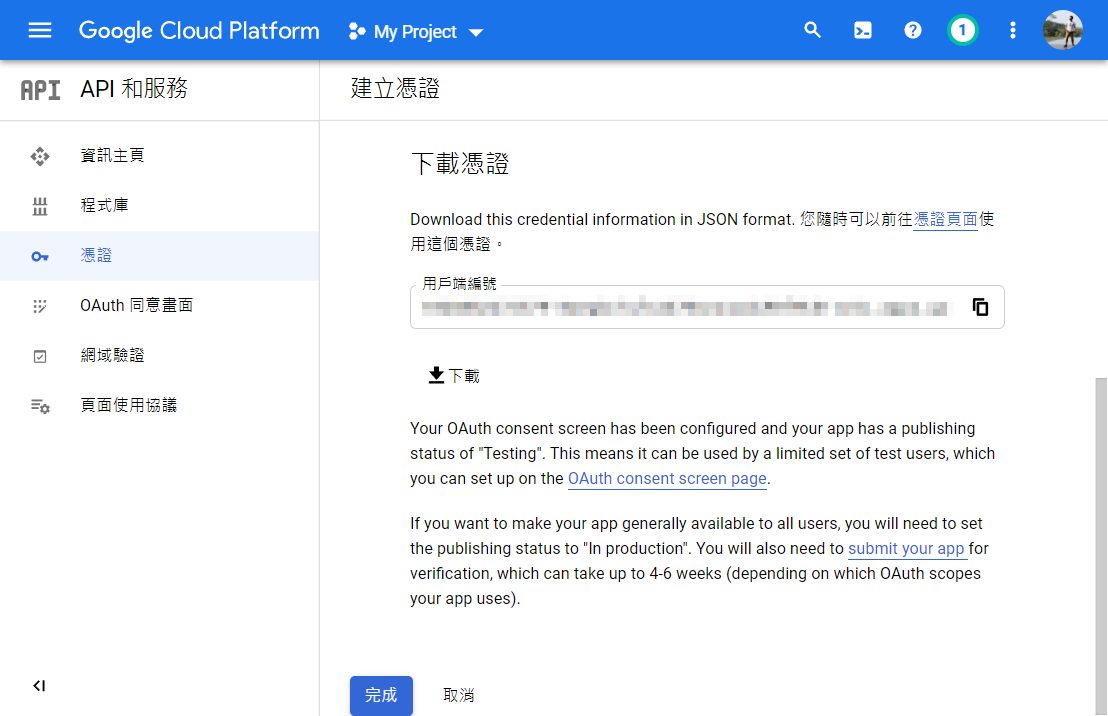
按完成後,憑證就設定完成了
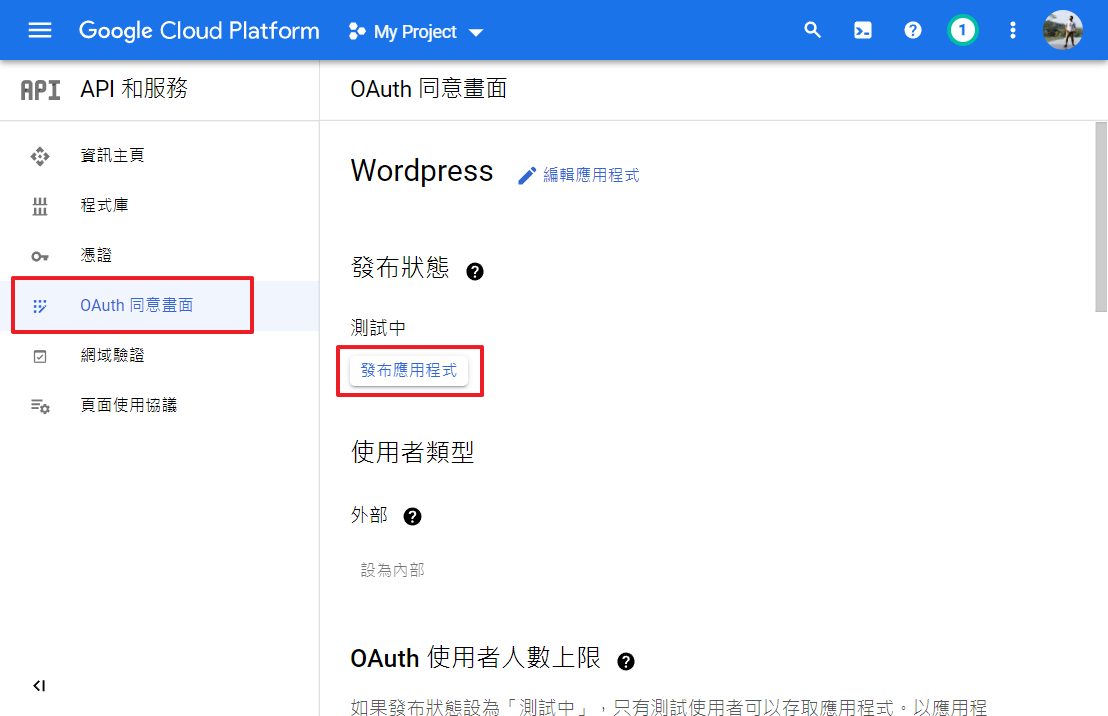
第三步
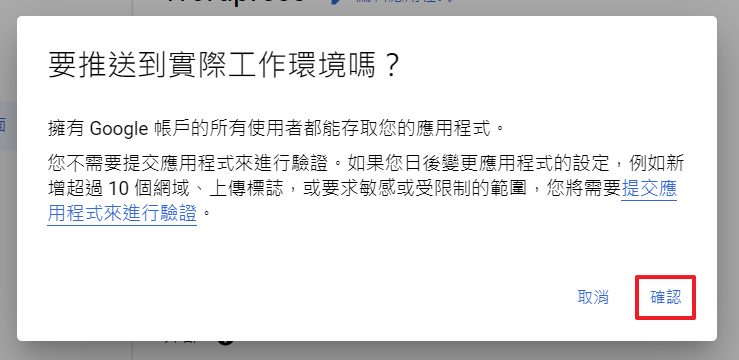
要跳到 「OAuth 同意畫面」的頁面中,發布應用程式
第四步
接著要到剛剛設定好的憑證複製帳號跟密碼。
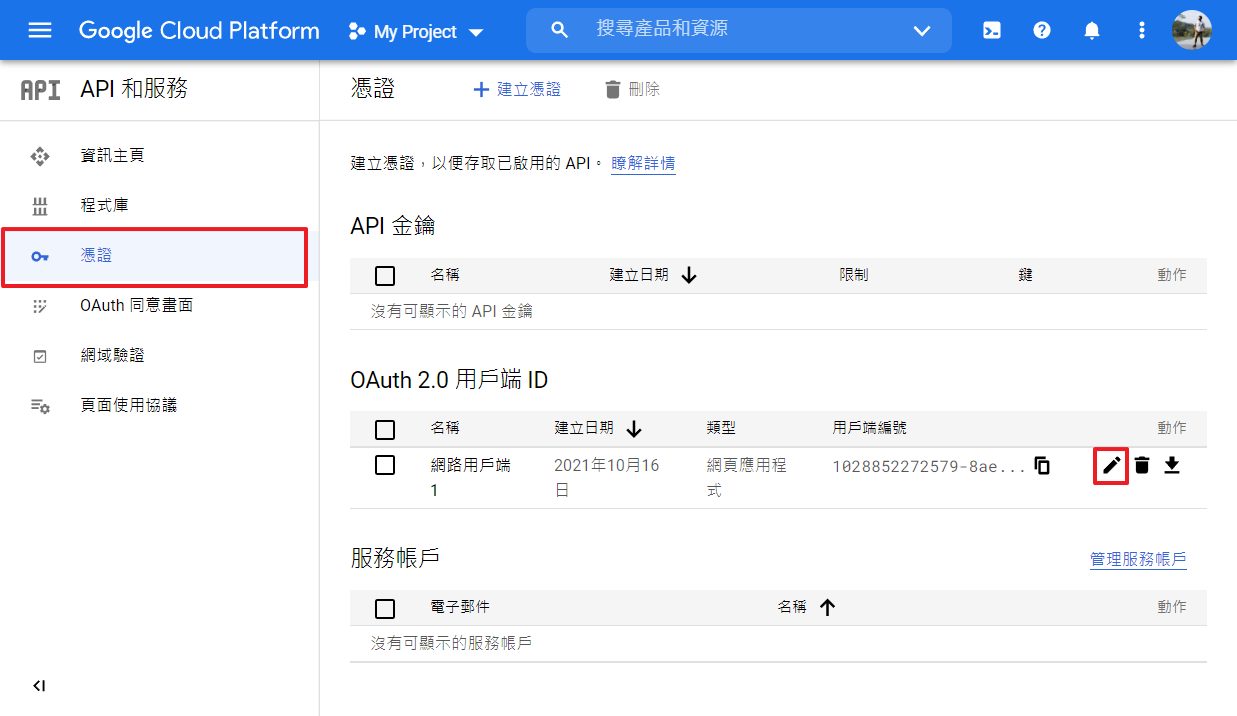
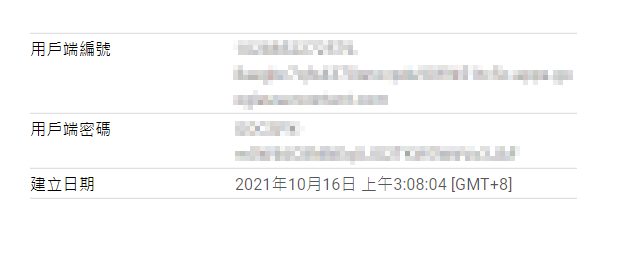
把用戶端編號跟用戶端密碼複製起來,等等要把資訊複製到外掛中
第五步
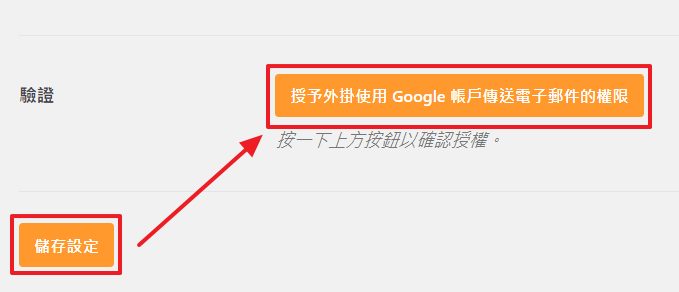
將剛剛複製的用戶端編號跟用戶端密碼貼到下面的欄位中
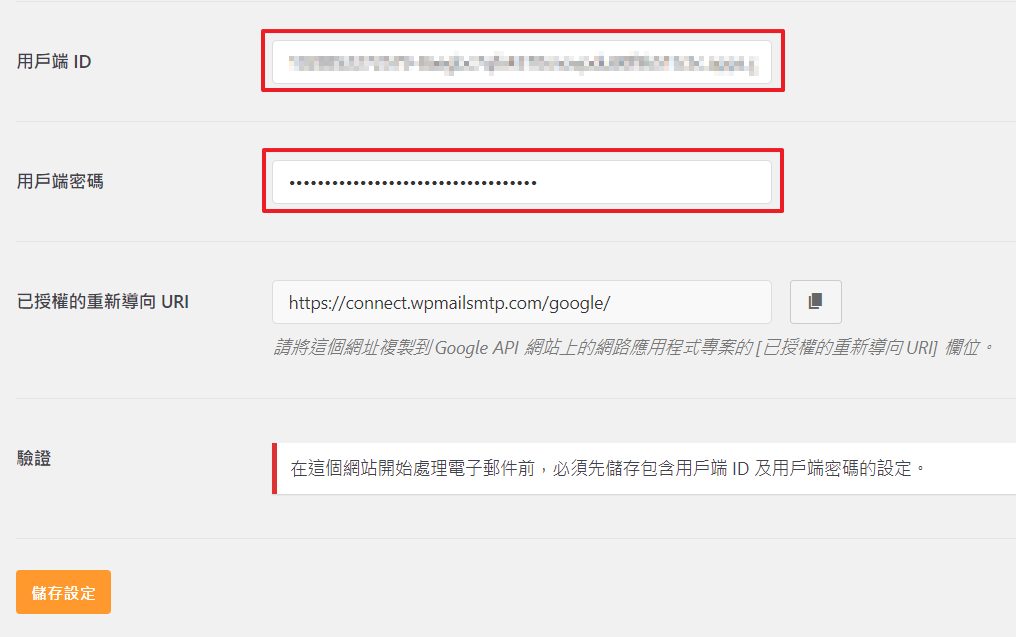
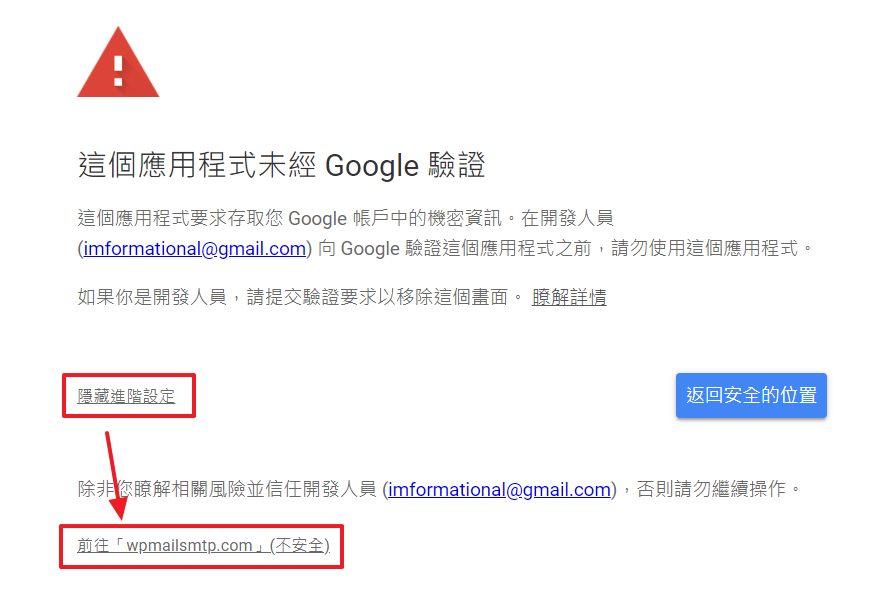
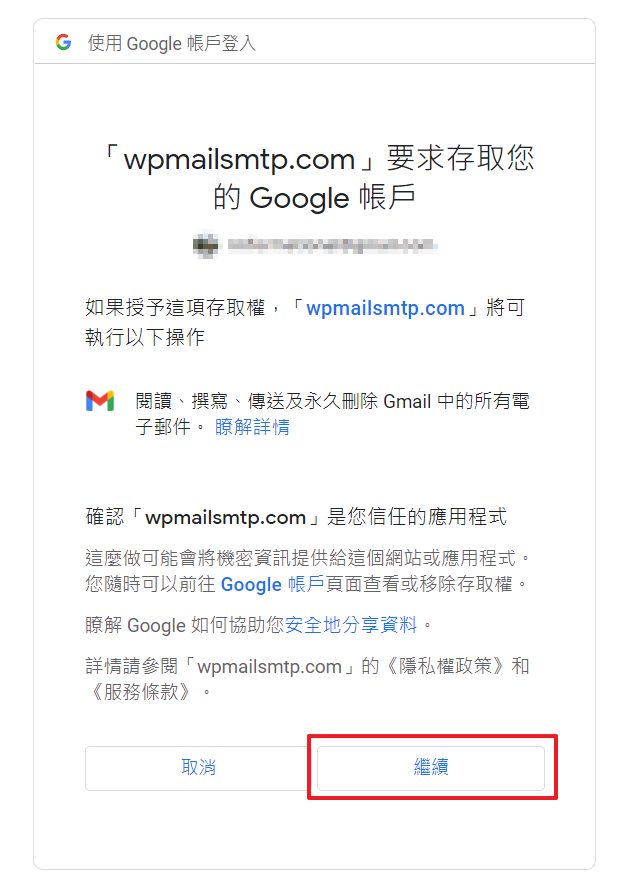
儲存後就會發現驗證的按鈕可以按了。給他按下去驗證
第六步
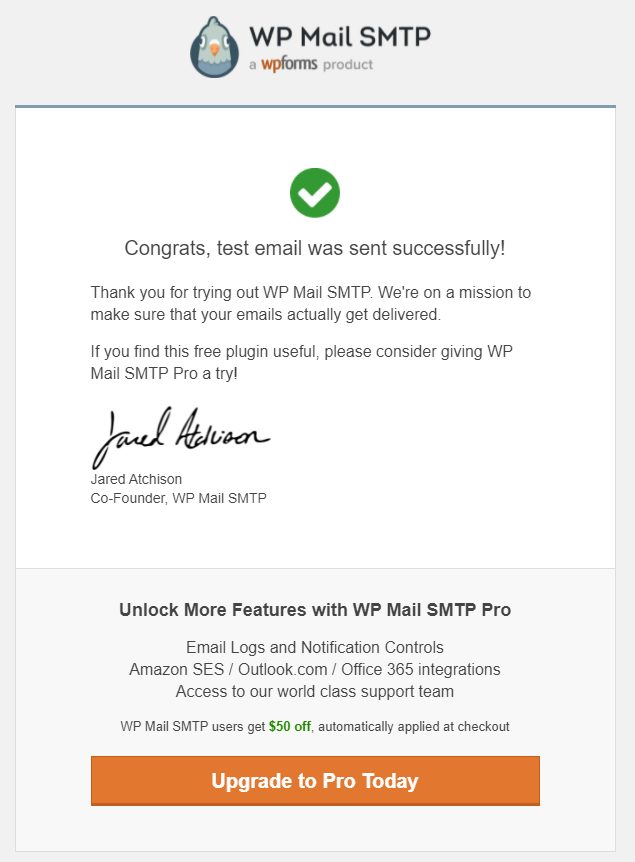
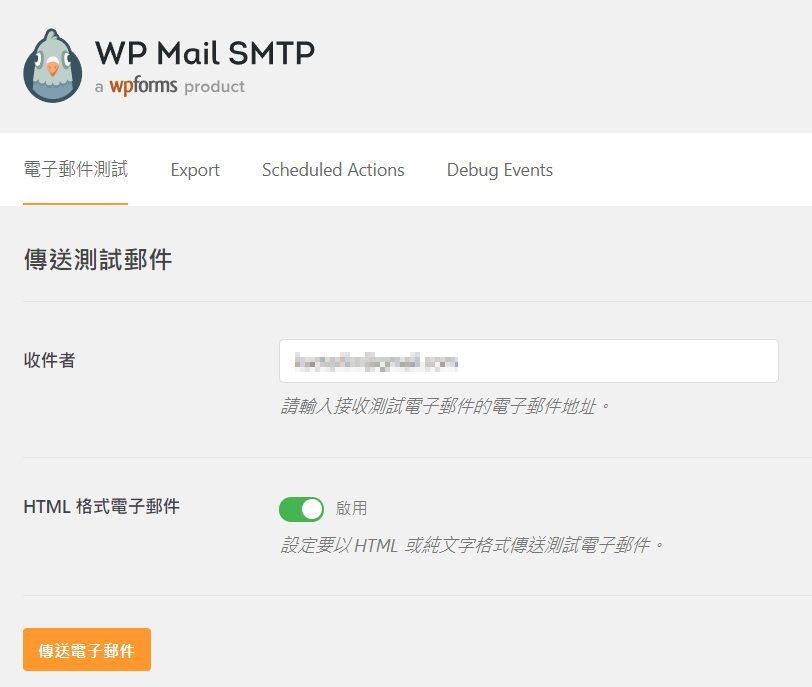
到這邊就可以來測試一下有沒有設定成功。到設定頁面中的電子郵件測試,輸入你要測試寄到的電子信箱,並按傳送電子郵件
如果設定成功的話就會收到下面的電子郵件囉~